

In this article, we briefly describe the major reason for removal of a fixed Prostheses (including crows, bridges, posts…etc), the possible scenarios indicating removal and methods used to remove them.
Removal of Fixed Prostheses
Removal of the prosthesis is really unpleasant to both the patient and doctor because removal needs force which will lead to trauma, cutting, torque, torsion and bending to the abutment .In addition, There is a great possibility of damaging the abutments and surrounding tissue during removal of fixed prosthesis. Thus, the most important goal during removal of the fixed prosthesis is preserving the abutment structure and integrity.
[divider scroll_text=””]Reasons of Removal
- Wear, breakage, partial loosening, bad esthetics, bad periodontal condition or occlusal changes.
- Treatment requires change in design (more pontics or abutments to be included in the restoration or splinting).
[divider scroll_text=””]End Results
After removal of the prothesis there are two possible outcomes:
- A re-usable prosthesis: prosthesis is repaired and cemented.
- An unusable prosthesis: Prosthesis is destroyed during removal. (most cases it’s not usable)
[divider scroll_text=””]Possible scenarios
Here are a few possible scenarios a dentist might face that its indicated to remove the prothesis:
- Try-in Stage for a Dental Bridge: During the this the doctor might face some resistance during removal, this occurs in: Full arch restoration, restoration with multiple pins and grooves and long abutment preparation.
- After temporary cementation: It’s best for any restoration to be temporarily cemented to give a change to see how the restoration performs during function.The doctor might face some difficulty during remove the restoration with temporary cements.
- After permanent cementation:
- Maybe required to be removed immediately, when? Because of failure of seating of the restoration due to very thick cement mix or excessive amount of cement being used.
- Maybe required to be removed several years after cementation, when?
- Solder joint failure thus repair is done outside the mouth after removal.
- Fracture of the aesthetics veneering that can’t be repaired except after removing it.
- Looseness of the fixed prosthesis è needs removal and correction of the design.
- Hypersensitivity after permanent cementation è due to over reduction, remaining caries or gingival recession.
- Fracture of the abutment (maybe due to the brittleness from the endodontic treatment).
- Colour change of the bridge (due to failure of selection a correct shade)
[divider scroll_text=””]Factors Influencing Removal
- Location of the restoration.
- Number of abutments.
- Thickness of the casting.
- Restorative materials.
- Pulpal condition.
- Carious dentine.
- Used cements.
- Age, brittleness and retentive form of the preparation.
- Periodontal condition of the abutments.
[divider scroll_text=””]
Methods of removal of fixed Prostheses
Remember to always to start with simplest method before shifting to a more complicated method during removal.
- Hand instruments.
- Crown Remover:
- Manual crown remover.
- Pneumatic Crown remover.
- Brass ligature wire.
- Chisel and hammer.
- Sectioning.
- Crown slitter.
Hand instruments
A large spoon excavator or universal scaler may be used at first, This technique is used mainly during try-in or after temporary cementation or in very loose restoration.

Steps:
- The tip of the instrument is placed on the cervical margin of the crown.
- Traction is made along the pathway of insertion (parallel to the long axis of the preparation).
- In case of a bridge è the tips is placed on the connector and pushed along the path way of insertion of the bridge.
[divider scroll_text=””]
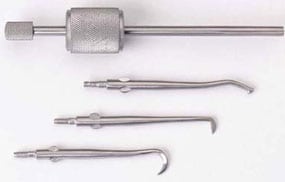
Crown Removers
Manual crown remover
Instrument:
- A sliding weight placed along the length of a thick metal shaft.
- It has varies tips. (a design to be under the margins of the crown and another design to be placed in the inter-proximal).
Technique of crown:
- Place tip in the desired place.
- Sliding weight is tapped forcibly to the end of the instrument (opposite to the tooth).
- Till the restoration is loosen.
- Considerations: Limit its use revere mallet if the restoration is already loose to prevent possible breakage.
Technique of Bridge:
- Place the curved tip of the instrument is rested on the connector area.
- In case of cantilever bridge use a specific type of crown remover.
Special considerations:
- The crown remover is dangerous and should be used with extra care.
- It can result in damage not only the abutment but also the teeth in the opposite arch and surround tissue (gingival and facial).
[divider scroll_text=””]Pneumatic Crown Remover
Instrument:
- Consists of a straight headpiece
- Attached to a module of the micro motor
- Which a working tip is attached to it as well.
- The number of strokes and intensity is controlled by a regulator.
Action: Produces a series of sustained retracting movements without the need to alter the manual tension. 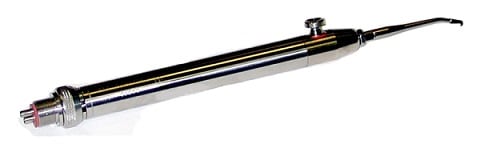
- Select a suitable tip.
- It’s better to place the tip on the metal part of the restoration if possible.
- Begin with mild force and mild number of strokes.
- The direction of traction should be parallel too the long axis of the coronal portion of the tooth (especially in endodontic treated teeth).
- During removing a long span fixed prosthesis (involving multiple abutments) repeated strokes are applied first at multiple points of the connectors till it starts to become loose.
- Once it becomes loose, place the tip at the margins of the retainer and apply the strokes till removal of the prosthesis.
Consideration: Never use the crown remover on a loose or periodontal compromised abutment.
[divider scroll_text=””] Brass Ligature Wire
Instrument: 50 cm length of metal wire 

- The wire is ligated around the distal aspect of the connector of the prosthesis.
- A wooden bar is placed across the wire.
- A hammer is applied to the wooden bar.
Indications:
- Used to remove bridged and custom made posts.

[divider scroll_text=””]Chisel and Hammer
The most effective and oldest methods to remove crowns and bridges, but its considered very risky and needs experiences (especially with edno Treated teeth) as improper use or un-gradual application of force will lead to fracture of abutment. Instruments:
- A small surgical chisel and hammer is used.

Technique:
- The chisel is placed on the cervical margin of the retainer at a 45o with the long axis of the coronal portion of the abutment.
- Gradual hammering of the chisel.
- The placement of the chisel should be shifted between the mesial and distal sides.
- In case of a bridge:
- First place the chisel on the connector area and hammer.
- Then shift to the cervical margin of the retainer.
[divider scroll_text=””]Sectioning
Indication:
- When previous method of removal fails.
- When the abutments are periodontal compromised or loose.
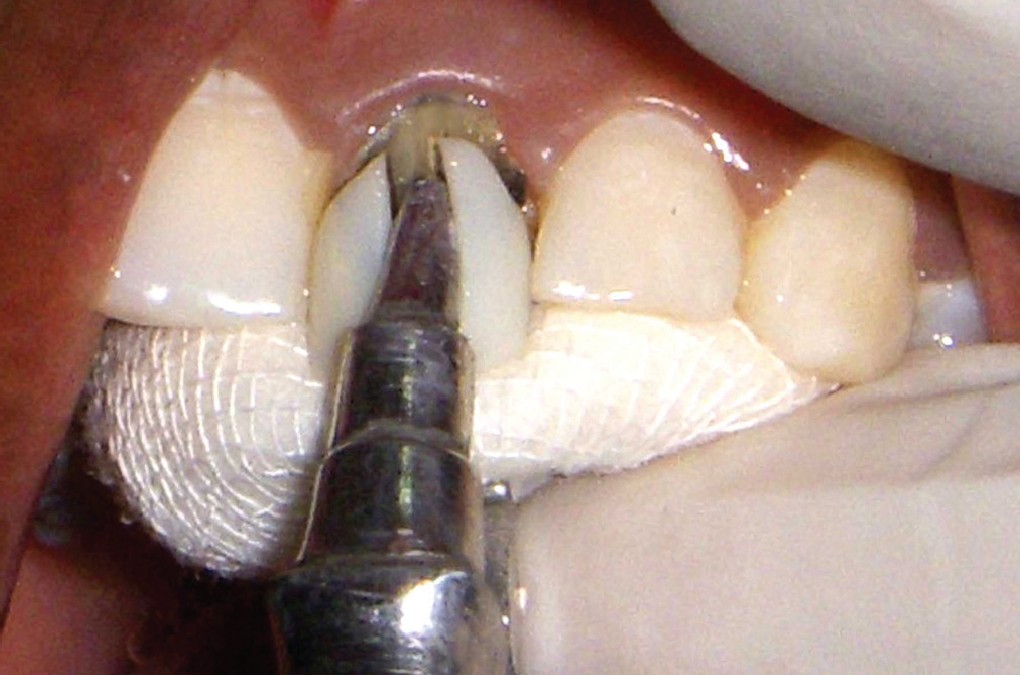
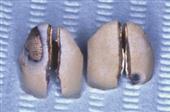
- A vertical slit is made in a vertical direction using a small carbide bur.
- It’s initiated at the gingival third of the tooth and progress slowly to the occlusal surface until the cement layer is reaching.
- It’s usually placed at the middle of the buccal surface.
- However a vertical tunnel at the mesio-buccal or disto-buccal line angel è to separate the two surfaces instead of one.
- Care is needed to make sure the vertical cut is parallel to the vertical cut on the other abutment.
- A blunt instrument is used like a chisel and is placed into the slit and twisted, why? to spread the crown apart slightly and loosen it.
- If there is still resistance è extend the tunnel to half the occlusal surface.
- In case of metal-ceramic restorations, a small round diamond bur is used to remove the porcelain then a carbide bur to remove the metal substructure.
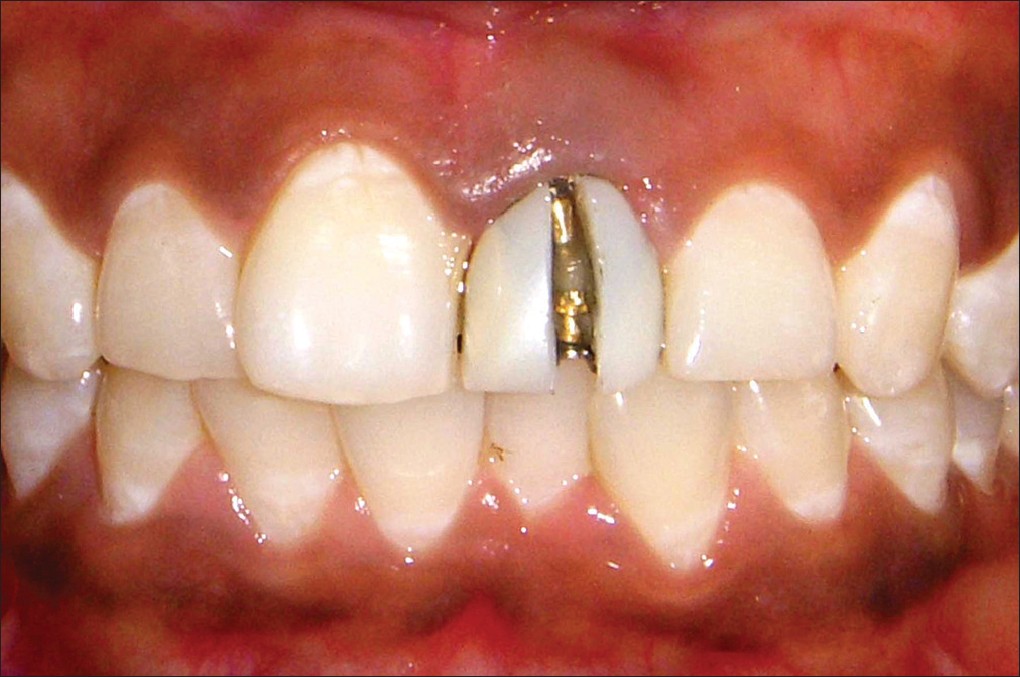
[divider scroll_text=””]Crown Slitter

Instrument:
- A forceps with a one flat horizontally end and the other end with a sharp metal blade.
- A forceps is used to cut out the crown. (Swaged type, medium type or cast gold type crown).
Steps:
- The flat end is placed on the incisor or occlusal table of the crown.
- The sharp blade is placed on the cervical margin.
- Close the forceps to cuts the cervico-occlusal through the crown.
- Use a hand instrument to spread the halves and help remove the crown.

[divider scroll_text=””]
Removal of Special Restorations
Fabricated Post: Remove the restoration than make a hole in the crown, finally apply the brass ligature wire method to remove the post.
Pin ledge, ½ crown, ¾ crown or crown: A hand instrument is (enamel chisel) to open the cavo-surface margin than a chisel and hammer is applied to the cervical margin. Full arch restoration: If to preserve the restoration use either by crown remover or chisel & hammer. If no need to preserve the restoration separate by sectioning into 3 bridges inside the patients mouth, and remove each part separately like a normal bridge should be removed.
[divider scroll_text=””]
Sources
- Bridge Failure Reham Al-haratani, Paediatric Dentist/ Teaching Assistant at Umm Al-Qura University, Faculty of Dentistry on Dec 20, 2010.
- Bridge failure by by aneeqa yaqub.
- Photo Essay by Michael C. DiTolla, DDS, FAGD
- Removal of Fixed Prothesis By Dr. Mohsen S. Ozaibi, 2008.
- Sharma A, Rahul GR, Poduval ST, Shetty K. Removal of failed crown and bridge. J Clin Exp Dent. 2012;4(3):e167-72.
OziDent Members Only
The rest of article is viewable only to site members,Please Register and/ or Confirm registration via EmailHere.If you are an existing user, please login.


